| I wonder how long that lasts and why other methods are not recomended and how long mine will last? | |
| Oh ye of little faith:
http://www.lockmonster.co.uk/search/tag/ceka-graphite-powder.html |
|
| Thanks guys,
Ian M, sorry I have no Idea where to get the u-shaped clips from. As to lubrication, I would think a lock person would know more about locks than us grease monkeys, any reason they advise special lock oil and nothing? JC, powder, hmm |
|
| Plastic to plastic = silicone
Locks - graphite powder |
|
| Excellent step by step instructions for a simple but satisfying evening project Did one a week or so ago and ended up, as you suggested, using graphite grease before assembly. Works great and feels wonderful when inserting the key without any notchiness. However, just finished a second one and before putting it together I was wondering if it really is a good idea to use any grease at all when putting it together. The only metal parts are in the lock cylinder while everything else is plastic-to-plastic movements. The first one I took apart did indeed have some kind of grease in it while the second one -- which was in better shape -- didn't. Talking to people that knows more about locks than I do they suggested that one should never use grease on any lock cylinder. They have suggested that the only lubrication that should be used is special lock oil for the cylinder while everyting else should be left without lubrication. I'm inclined to believe they may be correct, except I would want some kind of oil or grease covering the cylinder to avoid oxidation and buildup of deposits, which I found on both of these. What's the consensus? Should the lubrication be limited to oiling the lock cylinder and leaving the various plastic parts alone. |
|
| good tutorial alan and good pics and easy to follow |
|
| Nice one Al.
Dont spose you know where I can get those u-shape clips from? |
|
| Wow!! i look forward to reading your engine build tutorial Al, we will have to get more web space first. |
|
| Blimey Al... new camera for Xmas?!?! |
|
| Following from this thread
http://www.alfa-pages.co.uk/viewtopic.php?t=6456&highlight=fuel+smell I was after replacement fuel filler cap rubber, as I lost mine, it probably flew out when I dropped my cap once. I got a whole cap from Alex, thanks mate, I took that one apart and took some photos for a tutorial. I wanted to service mine as it has started to become stiff and instead of just filling up the lock with white grease, I would properly service it. Pics of it apart 
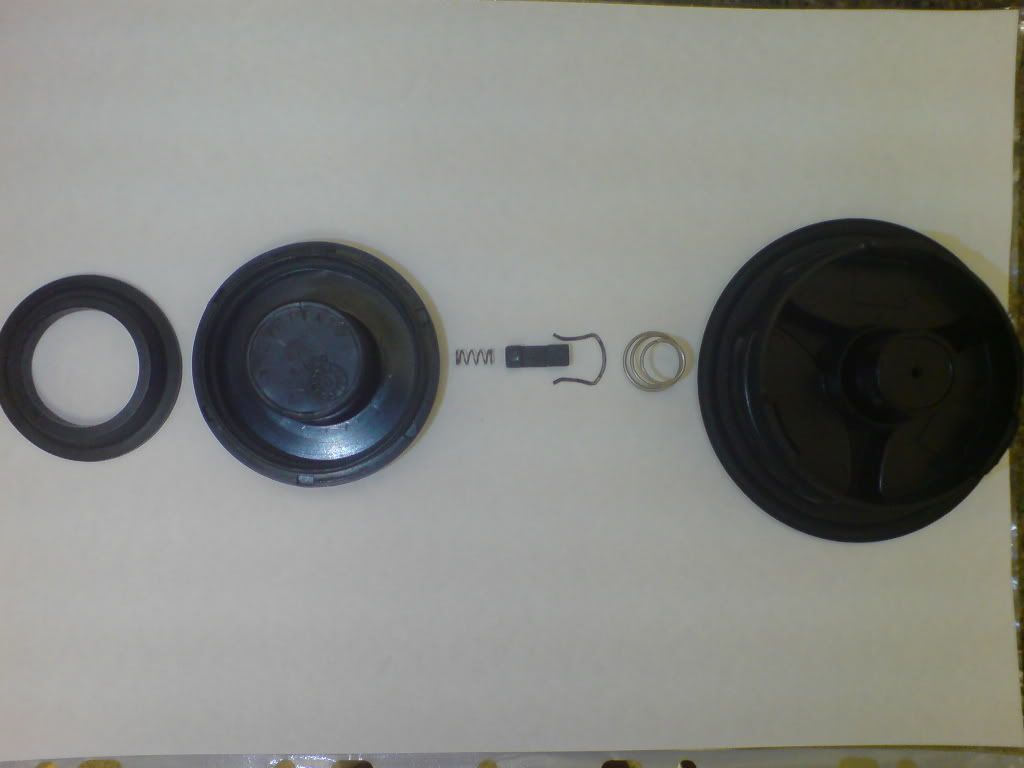
You can see the rubber gasket that I wanted on the left, it sits in the part next to it, that has a thread and screws into the filler neck. This then pushes onto the cap on the right, with the bits in the middle looking like this 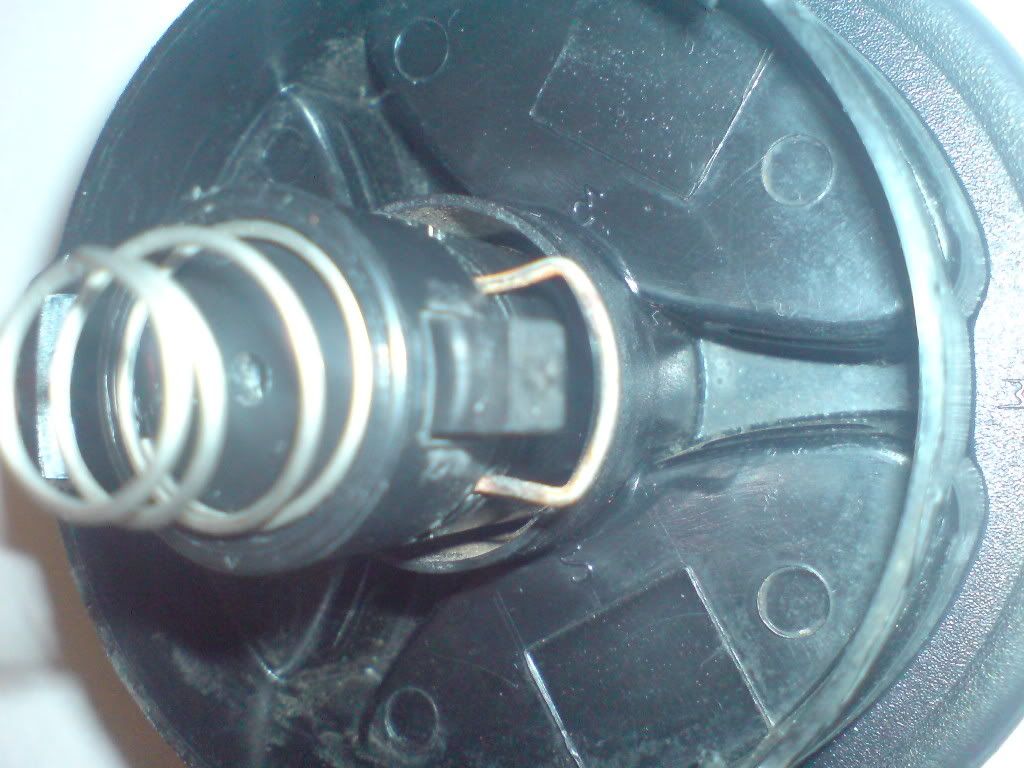
The metal clip holds the lock 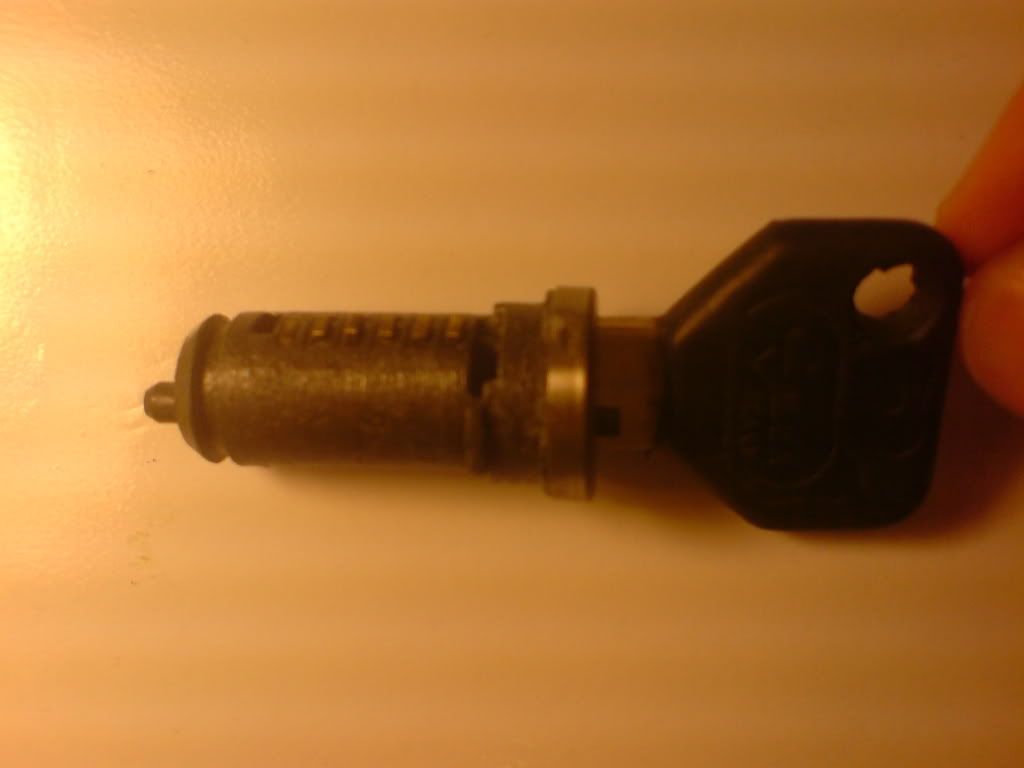

in place. When the lock is turned the nodule at the end of the barrel turns on the spring loaded plastic slider 

This either locks or unlocks the threaded part by locating in the grooves 
here you can see it in action 

The barrel has a stop tag on it which the cap allows the key to turn a set amount 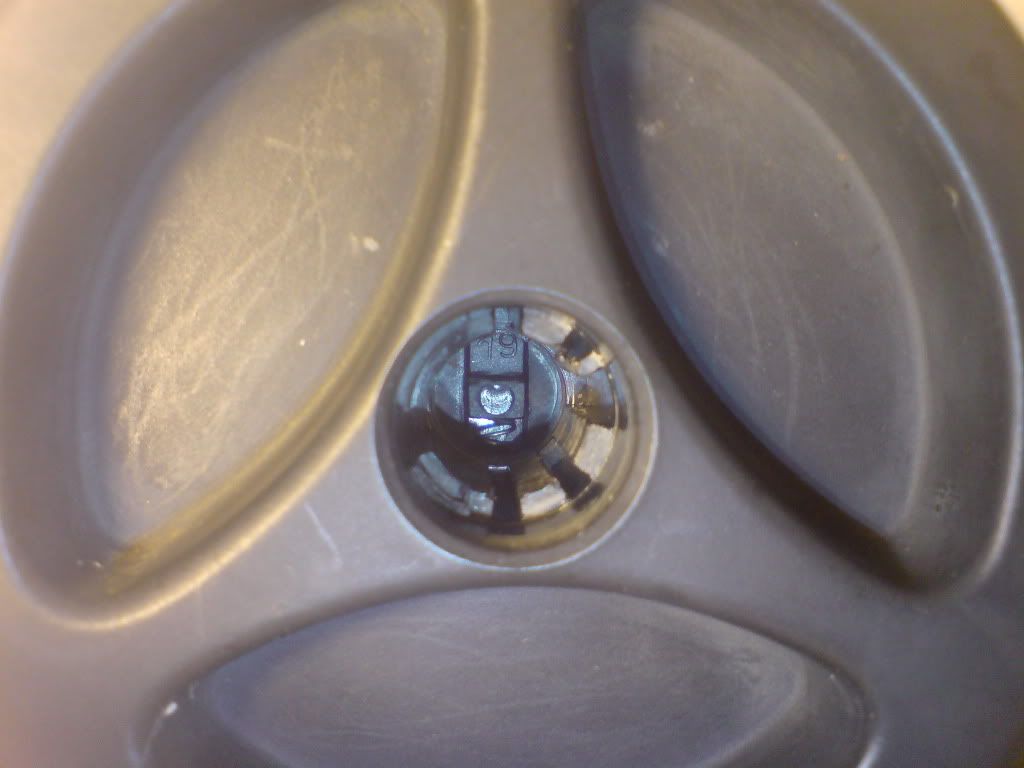

Its not easy to see. To take it apart there are 3 lugs that hold the whole thing together, prize them over one by one. I heated up the cap with a hair dryer so it didnt snap. The whole thing is spring loaded by a loose spring, so dont loose the spring when you take the centre out. You can now remove the U shaped clip holding in the barrel
Make sure the lock is in the position where the plastic slider is out, otherwise when you take out the barrel the spring and plastic slider will fly out. Check to see that all the tumblers move freely, if they dont you can use a screwdriver and tap from the bottom side until it moves freely. 

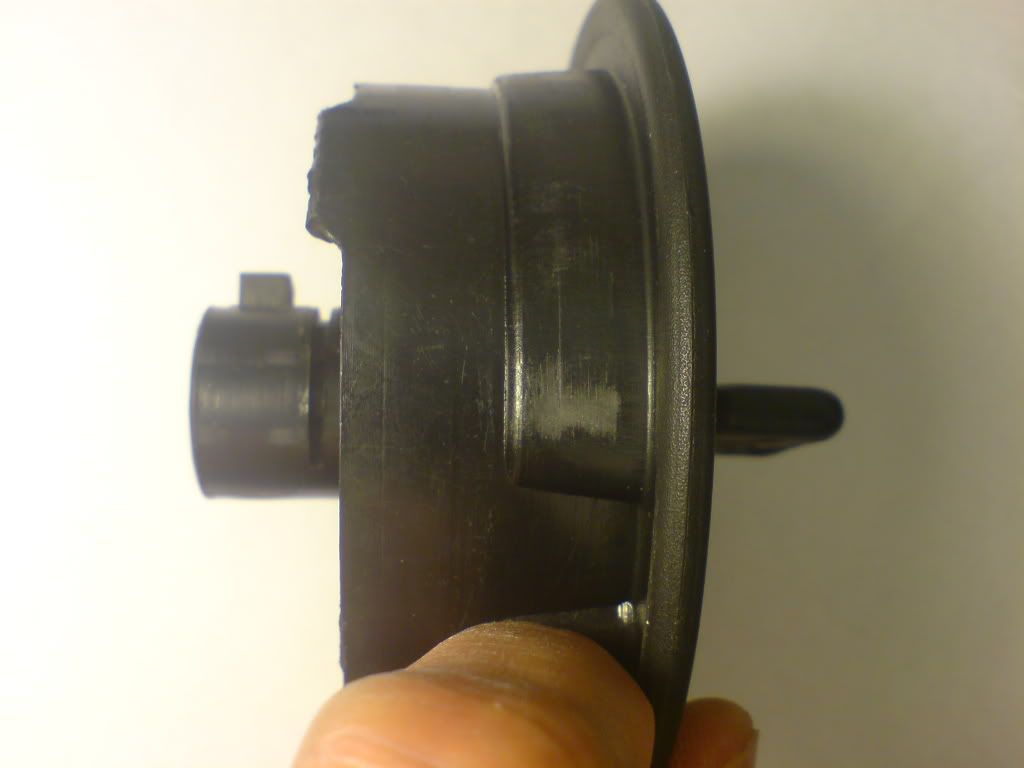
I chose to tap all the corrosion out lightly with the screw driver and soak it in lime scale remover, then clean with a wire brush, rinse with water and dry with a hair drier and lube it up afterwards. I would fill the whole lot up with white grease and never have to worry about it again. Fit together by putting in the spring loaded plastic slider, then the lock and then the U shaped clip to retain the lock. Then put the spring back in place and push the cover back on, making sure all 3 clips lock back in place. When I took mine apart I noticed it was different, there are no 3 clips but a round plastic cover that is glued in place. 
Luckily mine came off without any problem, also the whole of the middle part is made of metal and not plastic like the other one. This metal will never allow the key to turn more than it should, unlike the other one which did. 
I also noticed a rubber grommet around the barrel 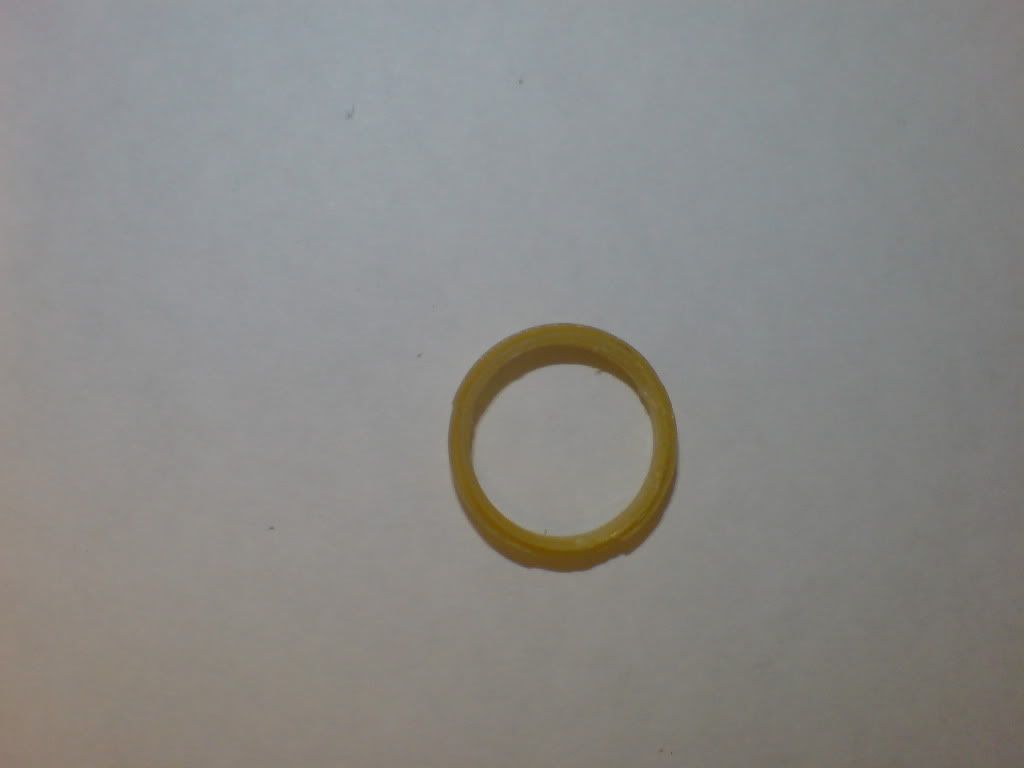
which is missing from the other one 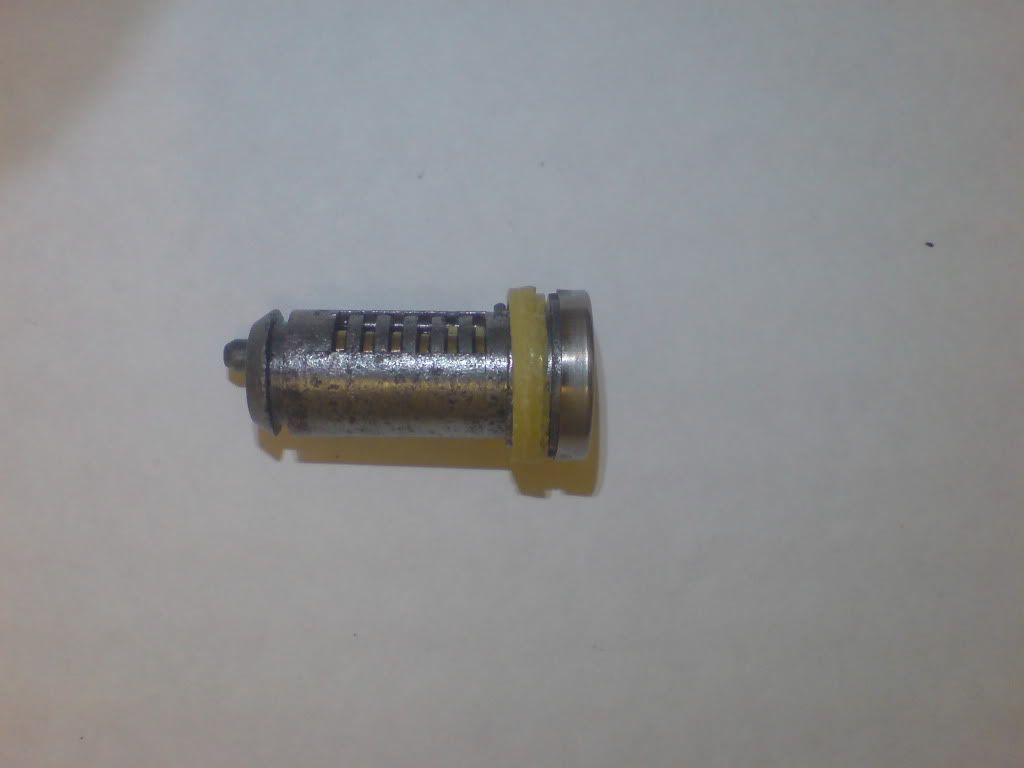
All three parts 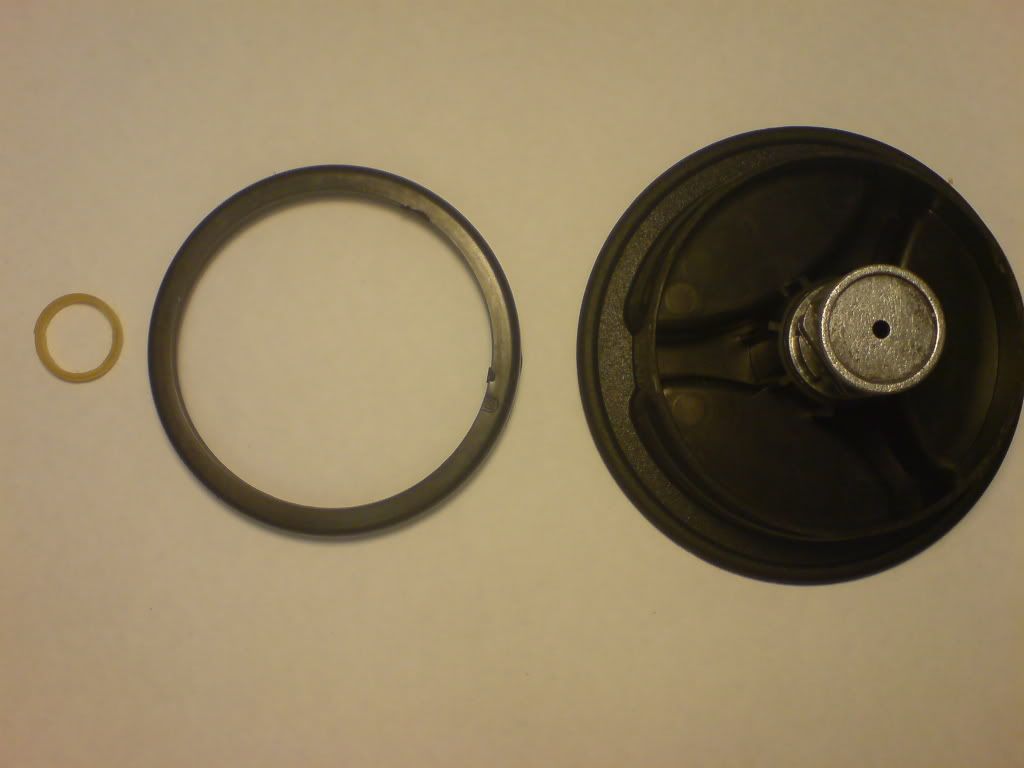
When I put mine back together, I weighed down the centre part and applied industrial strength super glue to both parts and then let it set for 1 hour. The thing is under constant pressure from the spring so no harm. |
|